

Digital Menu Board Design: A Restaurant Manager's Guide
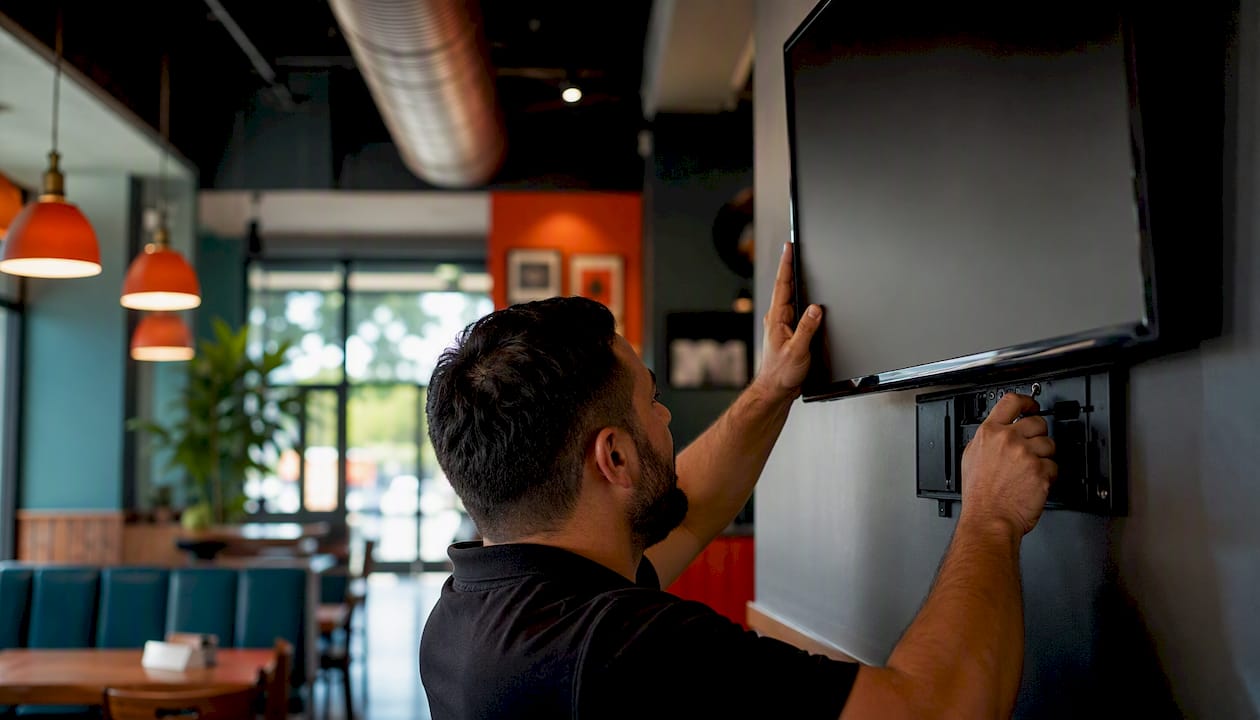
The fastest path to a live, sales-driving digital menu board is to start with a ready-made template, set your visual hierarchy before you touch any colors, configure a daypart schedule, and publish through a cloud platform like Signstream. You can go from blank screen to live board in under an hour when you follow this sequence:
Pick a template that matches your screen orientation (landscape behind the counter, portrait for queue-side displays).
Set your visual hierarchy first: category headers at the top, hero items in the center, prices aligned consistently on the right.
Configure your daypart schedule so breakfast, lunch, and dinner menus switch automatically without manual intervention.
Test on-site during a quiet period, standing at actual customer sightlines, before you go live.
Publish remotely from any device and monitor performance through your platform’s analytics dashboard.
Key Takeaways
Effective digital menu board design combines legibility, scheduled content, and centralized management to drive sales and reduce operational cost.
Point | Details |
Start with legibility and scheduling | Set font sizes for your viewing distance and configure daypart switching before finalizing any visual design. |
Use templates to launch faster | Ready-made templates from platforms like Signstream let you publish a professional board without a designer. |
Centralize all menu updates | One dashboard pushing to all screens eliminates version errors and cuts update time for multi-location operators. |
Budget hardware and software separately | Entry-level setups run $300 per screen in hardware plus $10–$20 per month in software per screen. |
Signstream for fast deployment | Signstream offers unlimited screen deployment, daypart scheduling, and an ad exchange marketplace on a single subscription. |
Table of Contents
What do digital menu boards actually change for your business?
The business case for switching from printed boards is straightforward. Digital menu board design lets you update prices, swap promoted items, and push limited-time offers across every screen in seconds, where a printed reprint costs time and money every single cycle. For a quick-serve restaurant running two dayparts, that alone eliminates a recurring operational cost.
The revenue side is equally direct. Screens that highlight high-margin items with a photo or a short animation consistently lift average check values, because customers notice what’s prominent. Screens increase restaurant revenue through upsell placement that a static board simply cannot replicate dynamically.
Faster customer decisions: Clear hierarchy and focused category grouping reduce decision time at the counter, which shortens queues during peak hours.
Higher average check: Promotional zones featuring combo upgrades or add-ons drive upsell without any staff involvement.
Lower operational cost: No reprints, no lamination, no physical swap-outs when a menu item sells out or a price changes.
Centralized accuracy: One update pushes to every screen simultaneously, eliminating the version drift that plagues multi-location operators.
Seasonal agility: Seasonal menu promotions can go live the same day a decision is made, not a week later when new printed boards arrive.
Dayparting — the automatic switching between breakfast, lunch, and dinner menus — increases relevance for customers and supports revenue uplift by showing the right items at the right time. For a franchise with 20 locations, that scheduling happens once and runs everywhere. Large-scale deployments confirm this is operationally feasible: Disney’s Swan and Dolphin Resort manages complex content programs across hundreds of screens using cloud signage, demonstrating what centralized orchestration looks like at scale.
What software features does your menu board platform need?
Not every platform is built for restaurant operations. Before you commit to a subscription, confirm these features are present:
Centralized menu management: One source of truth that pushes updates to all screens simultaneously. Centralized menu systems reduce errors and cut rollout time for multi-location businesses.
Menu scheduling and dayparting: Automatic time-based switching between menu sets, so your breakfast board becomes your lunch board at 10:30 AM without anyone touching a screen.
POS and inventory integration: Screens that connect to your point-of-sale system can hide sold-out items automatically, preventing customer frustration.
Remote publishing: Push updates from a phone or laptop, not from a USB drive plugged into each screen.
Role-based access: Let a store manager update daily specials without giving them access to brand-level template settings.
Analytics: Know which content zones get the most attention and which promotions correlate with sales spikes.
Template library: Cloud editors with template libraries reduce time-to-publish and eliminate the need for an in-house designer for every update.
Media management: Organized asset storage so your team can find the right image in seconds, not minutes.
Menu scheduling tools often let operators set different prices and availability per daypart, which is useful for breakfast/lunch price differences and limited-time offers. That flexibility matters more than most managers realize until they’re manually swapping files at 10 AM every day.
Pro Tip: Ask any platform vendor whether you can import menu items via CSV. Bulk imports save hours when you’re onboarding a new location or doing a full menu refresh, and platforms that lack this force you into tedious manual entry.
What design rules make a menu board readable and persuasive?
A menu that sells is legible first, prioritized second, and visually matched to its physical environment. Every other design choice flows from those three constraints.
Design must start from the venue: screen size, viewing distance, ambient light, and mounting height determine your minimum readable font sizes and whether a photo-heavy or text-first layout works best. A 55-inch screen mounted 8 feet high in a bright QSR needs different typography than a 32-inch portrait screen in a dim cocktail bar.
Visual hierarchy and typography
Prices belong in a consistent position on every row — right-aligned is the most readable convention. Body text for item descriptions should sit at a minimum of 24pt for screens viewed from 8–10 feet; go larger for higher mounting. High-contrast palettes (dark background, light text, or the reverse) outperform mid-tone combinations, which wash out under ambient light.
Limit yourself to two font families maximum: one for headers, one for body. More than two creates visual noise that slows reading.
Imagery, motion, and accessibility
Use hero images for your top two or three promoted items only. A board covered in photos of every item competes with itself and slows decision-making, particularly in quick-serve environments where speed matters most. Animation belongs in promotional zones only — a subtle loop on a featured combo, not spinning text on every category header.
For accessibility, use color-blind-friendly palettes (avoid red/green combinations as the sole differentiator), include clear allergen labeling, and maintain sufficient contrast ratios. The Web Content Accessibility Guidelines (WCAG) recommend a minimum 4.5:1 contrast ratio for normal text, a standard worth applying to menu boards even when not legally mandated.
Design dos and don’ts:
✅ Group items by category with clear visual separators
✅ Use white space deliberately — crowded boards lose customers
✅ Highlight one or two high-margin items per category with a badge or color accent
❌ Never use more than three colors in your primary palette
❌ Avoid fonts below 24pt for any customer-facing text
❌ Don’t animate every element — motion should direct attention, not scatter it
Pro Tip: Before your go-live date, stand at the actual customer queue position during a quiet hour and read every item on the board. If you squint or step closer, your font is too small.
Which template type fits your screen format and service model?
The right template depends on your screen layout and how customers interact with your space. Dribbble’s digital menu board gallery and Behance’s project library both show finished designs across these categories, and MustHaveMenus offers editable templates restaurants can publish quickly without a custom design process.
Template types by service model:
Text-led grid (quick-serve): Maximum items per screen, minimal imagery, fast scanning. Best for high-volume counters where speed of decision is the priority.
Hero-image layout (full-service or premium QSR): One or two large food photos dominate, with a supporting pricing grid below. Drives emotional appeal and works well for signature dishes.
Promo zone + pricing grid (retail kiosk or café): A dedicated promotional panel on the left or top third, with a clean pricing grid filling the remainder. Ideal for rotating limited-time offers alongside a stable core menu.
Portrait queue-side display: Narrow vertical format, single category per screen, large text. Designed for customers reading while waiting in line.
For promotional display types, a split-zone layout with a promotional panel works better than embedding promotions inside the main menu grid, where they compete with regular items for attention.
Recommended screen specs for common commercial displays:
How do you go from install to live without common failures?
A deployment that skips steps creates problems that are expensive to fix after mounting. Follow this sequence:
Choose screen size and orientation based on viewing distance and mounting position. A screen viewed from 10 feet needs to be at least 43 inches diagonal for text to remain readable.
Select your display hardware. Commercial-grade displays handle continuous operation better than consumer TVs. Alternatively, a smart TV app like Signstream’s removes the need for a separate media player.
Set up your media player or app and connect it to your network. Wired Ethernet is more reliable than Wi-Fi for screens that must stay live during service.
Plan cable routing and mounting before drilling. Concealed cable runs look professional and prevent trip hazards.
Configure your playlist and daypart schedule in your platform before the screen goes up, so you’re not configuring software on a ladder.
Connect your POS integration and test that sold-out items hide correctly.
Run a full go-live test during a low-traffic period: walk the customer path, check every screen, and confirm daypart switching fires at the correct times.
Getting started with digital signage for restaurants covers the full platform setup in detail if you need a deeper walkthrough after hardware is in place.
Pro Tip: In glass-fronted spaces, mount screens slightly angled downward (3–5 degrees) and use matte-finish screen protectors to cut glare. Reflection from windows is the most common complaint from customers in café and retail environments.
What should you expect to pay for a digital menu board setup?
Costs break into three buckets: hardware, software subscription, and optional content or installation fees.
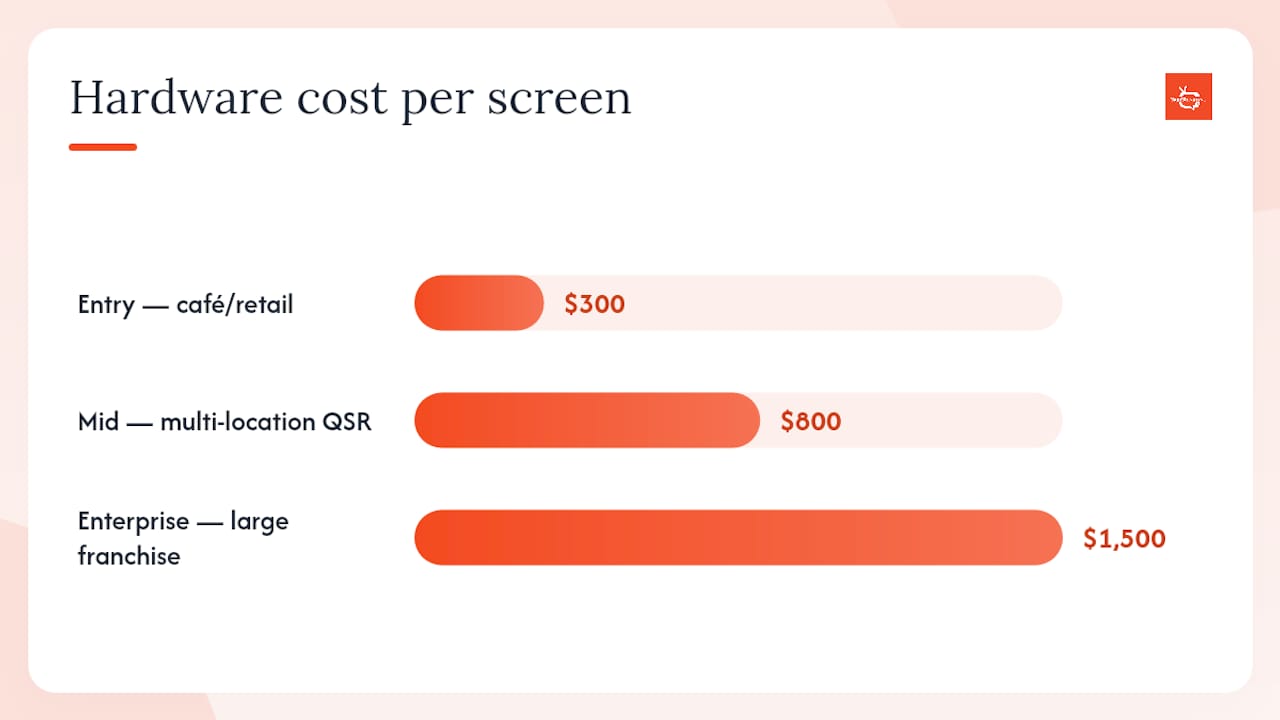
Hardware for a single commercial display runs from around $300 for a consumer-grade smart TV to $800–$1,500 for a commercial-grade panel with a longer duty cycle. A media player, if needed separately, adds $80–$200. Professional mounting and installation typically runs $150–$400 per screen depending on complexity.
Software follows a subscription model, typically priced per channel (per screen or per location) on monthly or annual terms. Entry-level platforms start around $10–$20 per screen per month. Mid-market platforms with scheduling, analytics, and integrations typically run $30–$60 per screen per month. Enterprise deployments with API access and dedicated support are priced on contract.
Deployment tier | Hardware (per screen) | Software (per screen/month) | Typical use case |
Entry-level | $300 | $10–$20 | Single-site café or retail |
Mid-market | $800 | $30–$60 | Multi-location QSR or franchise |
Enterprise | $1,500 | Custom | Large franchise or hospitality group |
ROI calculation: If a promotional zone on your menu board lifts average check by $0.75 per transaction and you run 200 transactions per day, that’s $150 per day in additional revenue. A $500 screen and $40/month software subscription pays back in under two weeks at that rate. Eliminating printed menu reprints at $200–$500 per reprint cycle adds further savings that compound over a year.
How Signstream helped a client improve outcomes
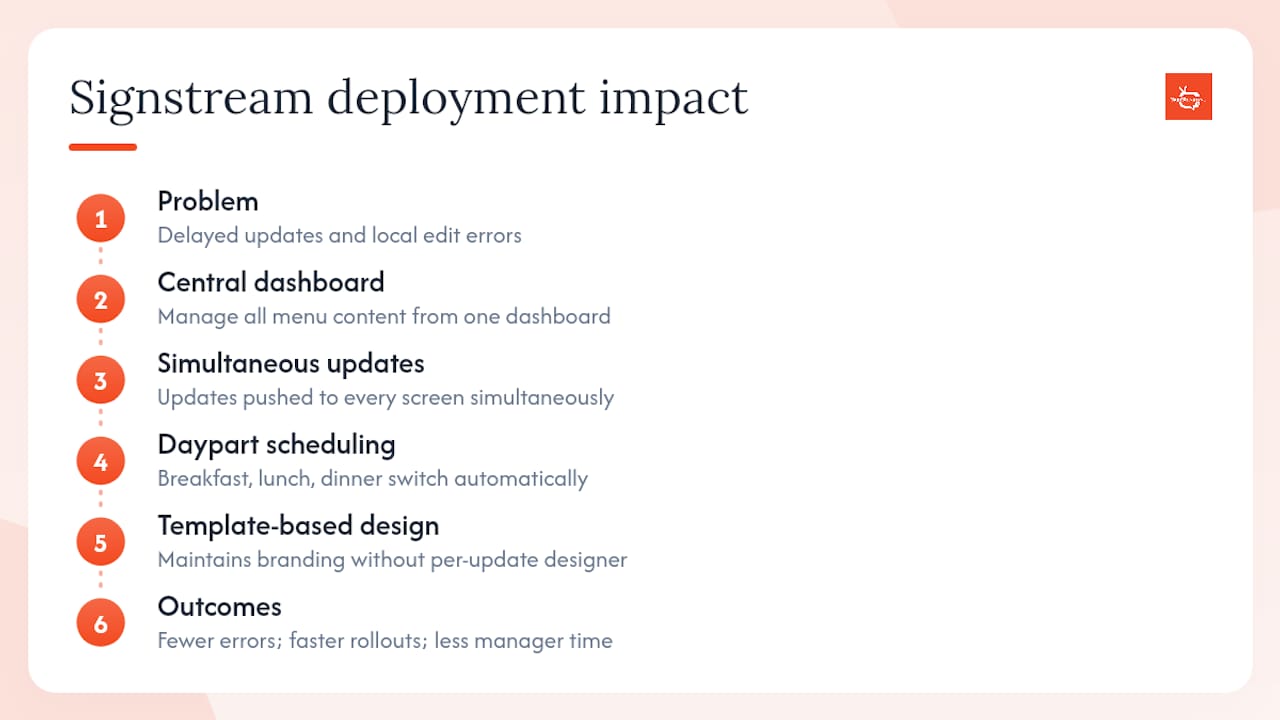
A restaurant group managing multiple locations faced a familiar problem: menu updates required sending new printed materials to each site, creating a lag between a price change decision and the moment customers saw it. Errors crept in when individual locations made local edits to their own boards.
After deploying Signstream, the group managed all menu content from a single dashboard. Updates pushed to every screen simultaneously, and daypart scheduling meant breakfast, lunch, and dinner menus switched automatically at configured times without any staff action. Template-based design kept branding consistent across locations without requiring a designer for each update.
Signstream clients have reported improvements in key performance outcomes post-deployment, reflecting the operational and engagement gains that centralized, scheduled digital signage delivers across locations.
The result was fewer errors, faster promotional rollouts, and a measurable reduction in the time managers spent on content logistics each week.
What the most important design decision actually is
Most managers spend too long debating colors and fonts when the decision that shapes everything else is simpler: choose legibility and scheduling before aesthetics. A beautifully designed board that customers can’t read from the queue, or that shows the lunch menu at 8 AM costs you sales every single service. Get those two things right first, and the visual refinements become much lower-stakes.
On the question of templates versus a custom designer: use templates for your first deployment and for any location that doesn’t have a distinct brand identity to express. Hire a designer only when your brand requires a visual language that no template can approximate, or when you’re building a flagship location where design is part of the customer experience. For most independent restaurants and retail operators, a well-chosen template configured with your own colors, fonts, and photography is indistinguishable from custom work at the counter.
Signstream gets your menu boards live faster
Signstream gives restaurant and retail operators centralized menu management, automatic daypart scheduling, unlimited screen deployment, and an interactive ad channel that lets you monetize your screens through a cross-promotional marketplace. You manage everything from a browser or mobile device, with no technical expertise required.
Whether you’re launching a single café screen or rolling out across a franchise network, Signstream’s template library and remote update platform mean you can go from concept to live board without a design team or an IT department. Pair your digital menu strategy with local restaurant marketing to connect your in-store promotions to your online discoverability. Start a free trial at Signstream and have your first board live today.
Sources
Recommended
Comments